Customizing ESXi installation with kickstart files and PXE boot
This blog post will be building on a previous post where I built a small PXE server environment for ESXi installation.
In this post we will enhance the PXE install with customized kickstart files specific for the hardware we want to install.
There's two new components to discuss here. The kickstart file (ks.cfg) it self and how to point to it during PXE boot.
Let's take a look at the current environment
The tftp server root is located at /var/lib/tftpboot and my images is stored as directories under this directory. The default (and at this point only) PXE menu is configured in the pxelinux.cfg/default file (used in legacy PXE boot)
Kickstart scripts
We'll start customizing with adding a generic kickstart file under a new ks directory. For more information about kickstart scripts be sure to check out VMware's extensive documentation, and of course William Lam's many posts, on the topic. Even though many of them are for older ESXi versions they still apply.
A generic ks file could look something like this:
##############################
# Custom ESXi kickstart file #
##############################

accepteula

install --firstdisk --overwritevmfs

#Set password, either encrypted or unencrypted
#rootpw --iscrypted <your encrypted password>
rootpw mypassword

#Keyboard
keyboard 'Norwegian'

reboot

network --bootproto=dhcp

%firstboot --interpreter=busybox

sleep 20
esxcli network vswitch standard uplink add --uplink-name vmnic1 --vswitch-name vSwitch0
esxcli network ip dns search add --domain=mydomain.com
esxcli network ip dns server add --server=192.168.1.1
esxcli system maintenanceMode set -e true

#Suppress shell warning
esxcli system settings advanced set -o /UserVars/SuppressShellWarning -i 1

# enable & start remote ESXi Shell  (SSH)
vim-cmd hostsvc/enable_ssh
vim-cmd hostsvc/start_ssh

reboot
I won't go in to all the specific lines here, there's a lot happening. We are running the install, setting a password, and after the installation we're doing some network customizations and enabling ssh. Check out VMware docs and William Lam's posts mentioned above for more details.
To tie this up to the pxelinux default menu or the default option in UEFI boot we will change the default file. The first thing to understand is that the file needs to be available somehow. There are many ways of making it available, you can include it with the image, on a USB drive, or at a network location (FTP, NFS or HTTP/HTTPS). In our scenario we will use HTTP for delivering the file, and we will use the http service installed in the previous post.
Configure the http server
The http server needs to be enabled and started
systemctl enable httpd
systemctl start httpd
You also need to enable it through the Firewall
sudo firewall-cmd --zone=public --add-service=http --permanent
sudo firewall-cmd --reload
To have the http server serve your files you could either change the default www directory to your kickstart directory, or move/copy your kickstart files to the www/html dir, or even better just make a link to your ks directory :-)
ln -s /var/lib/tftpboot/ks /var/www/html
Now, you should be able to verify that it works by doing a curl to your ks file from http
curl http://<ipaddress>/ks/ks.cfg
If you get an error stating you don't have access, you'll need to update the security context (Note that this depends on your system, when trying the same on a RHEL server we needed to do a semanage thingy. Google is your friend here :-))
chcon -R —reference=/var/www/html /var/lib/tftpboot/ks
After configuring the http service and have it serve your kickstart file it's time to update the PXE files to use this file.
UEFI
To specify the kickstart file in UEFI PXE boot we'll update the boot.cfg file in the tftpboot root folder.
Change the kernelopt= line to the following
kernelopt=ks=http://<ip>/ks/ks.cfg
At this point you should be able to PXE boot on UEFI with the default kickstart script.
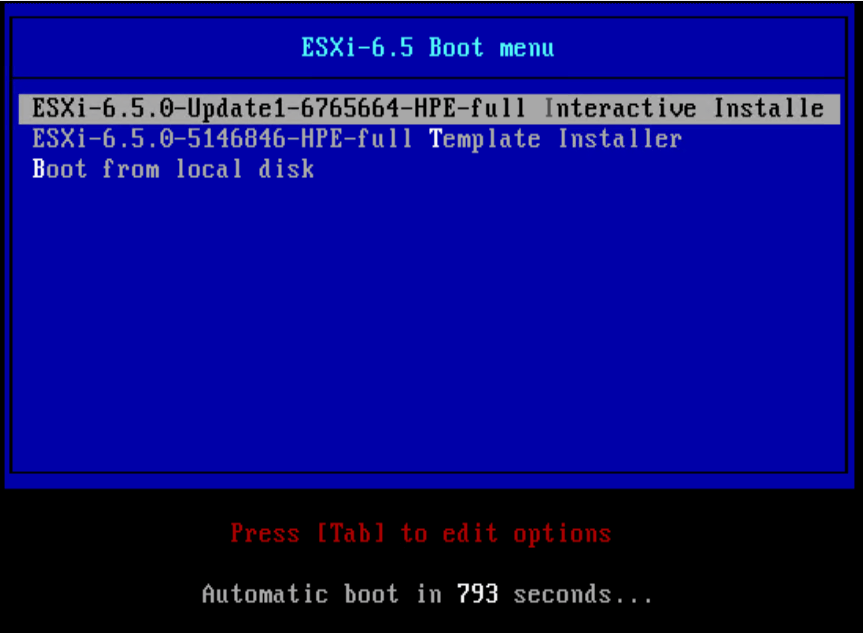
Legacy boot (syslinux)
Modify the default (legacy) PXE menu to include your script.
DEFAULT menu.c32
MENU TITLE ESXi-6.5 Boot Menu
NOHALT 1
PROMPT 0
TIMEOUT 300
LABEL esxi65u1-interactive
    KERNEL esxi65u1/mboot.c32
    APPEND -c esxi65u1/boot.cfg
    MENU LABEL ESXi-6.5U1 ^Interactive installer
LABEL esxi65u1-scripted
    KERNEL esxi65u1/mboot.c32
    APPEND -c esxi65u1/boot.cfg vlanid=<vlan> ks=http://<ip>/ks/ks.cfg
    MENU LABEL ESXi-6.5U1 ^Interactive installer
LABEL hddboot
    LOCALBOOT 0x80
    MENU LABEL ^Boot from local disk
The new stuff includes a new menu entry where you add "ks=http://ipaddress to your tftp server/path to ks.cfg" to point to your new kickstart script.
PXE booting on trunked ports
A little note on PXE booting with trunk and VLANs...
In my environment we have our ESXi hosts on trunk ports and the TFTP and DHCP server is not located on the native VLAN. I struggled a while to have the server reach the TFTP/DHCP server.
This is split in two parts. First your NIC needs to support VLANing for PXE. This was straight forward on our servers (apart from missing the ability to script it..), we can set the VLAN for the PXE/DHCP server on the NICs used. The second part was the hardest to get right (maybe because of missing googling skills on my part). After the server got a DHCP address and contacted the TFTP server I got it to load the PXE menu. Then I selected the wanted option and it loaded the installer. After a while the installer failed stating that it couldn't contact the server.
I tested with adding a nobootif=1 to the boot.cfg but this didn't solve the issue.
The trick here was adding the vlanid parameter to the APPEND line in the pxelinux menu.
APPEND -c esxi65u1/boot.cfg vlanid=<vlan> ks=http://<ip>/ks/ks.cfg
And for UEFI boot add the vlanid to the kernelopt
kernelopt=vlanid=<vlan> ks=http://<ip>/ks/ks.cfg
Kickstart files for specific hosts
So, we'll build on this to further tailor our PXE environment. When provisioning lots of ESXi hosts you'll want to automate most of the process which means you probably won't want to manually enter things like the hostname, IP address and so on.
Now we'll add specific Kickstart files for this use case. The process differs somewhat depending on UEFI/Legacy PXE boot. The kickstart file with the specific host information is common to both and we'll put that in our ks/ directory. You can name this whatever you would like, but as we'll see in the next step we need to specify the specific PXE boot file with the MAC address of the host so I will name the ks file with this address as well for consistency.
In the kickstart file we'll change the network line from using --bootproto=dhcp to the following
network --bootproto=static --device=vmnic0 --vlanid=<VLAN> --ip=<IPADDRESS> --gateway=<GW> --netmask=<NETMASK> --nameserver=<DNS> --hostname=<HOSTNAME>
UEFI
For pointing a specific host to it's corresponding kickstart file in UEFI boot you'll have to add a directory under the tftpboot root with the mac address (with hyphens as the delimiter) of the host prefixed with a 01-. In this directory you'll add a boot.cfg file which points to your specific kickstart file
[xxx@provisioning-01 tftpboot]$ ls 01-xx-xx-xx-xx-6b-b8/
boot.cfg
In the boot.cfg file point to the ks file named after the mac address
kernelopt=vlanid=<vlan> ks=http://<ip>/ks/01-xx-xx-xx-xx-6b-b8.cfg
At this point you should be able to boot your host and it should find it's specific kickstart file and the rest is done automatically
Legacy PXE (syslinux)
The legacy option still works with the pxelinux.cfg/ directory. In addition to the default file which contains your PXE boot menu you will add a file named after the mac address of your host prefixed with a 01- as in the UEFI example. This file will have a specific menu with a (default) option pointing to your kickstart file
LABEL esxi65-default-mac
    KERNEL esxi65u1/mboot.c32
    APPEND -c esxi65u1/boot.cfg vlanid=<vlan> ks=http://<ip>/ks/01-xx-xx-xx-xx-6b-b8.cfg
    MENU LABEL ESXi-6.5.0 DEFAULT ^MAC-BOUND Installer
And now your PXE boot menu should include this option and optionally it will use it as the default and thereby having the installer load automatically after the specified timeout (in this case you might want to set a lower timeout)