Creating a Powershell module as an API wrapper
We all love today's modern web with lots of API's available, both for retrieving information from various sources, gaining additional insights and for transform and enrich your data. Most API's today are RESTFUL, meaning that they should follow the REST principles. REST is not a standard, it's more a guideline for how to design your API.
With the REST guidelines in place many API's share the same or similar structure and with that it gets easier to work with API's as you can make use of the same techniques. If you're familiar with Windows Powershell this is one of the easiest ways of exploring an API.
This was also the reason why my good colleague Martin Ehrnst and I decided to do a talk on using Powershell and API's on the Nordic Infrastructure Conference (NIC) in Oslo this year. The slides and demos from that session, Invoke-{your}RestMethod will available here shortly.
One of the demos shows how to use Powershell modules as a wrapper for an API. While the built-in Powershell cmdlet Invoke-RestMethod is a great way to explore an API it expects you to know how to deal with HEADERS, Body payload, Authentication etc.
For many users this could be stopping them from using the API. To do some of the "dirty work" for your users (and for your self) the mentioned demo show an example of how to mask this in a Powershell module.
I won't get into all details about Powershell modules or REST API's, but I will show you how you could combine these to make it easier for you and your users when consuming an API.
For more details about writing a Powershell module, check out this guide from Microsoft. To dive in to the details about REST, check out the creator Roy Fielding's publication
In this post we will continue with the two API's in the NIC session, namely the Star Wars API (SWAPI) and the SupportBee API. These API's does also use some HATEOAS (Hypermedia as the Engine of Application State) techniques where they have hyperlinks in the response.
The example API
First, we'll check out the Star Wars API, https://swapi.co. As always when working with API's be sure to check out the documentation.
This API contains characters, planets, starships etc. from the Star Wars universe. At the time of this writing it has not been updated with the latest film Episode 8.
The base of the API is the URL https://swapi.co/api
The different resources will make up the next part of the URL, i.e. the people resource is found at https://swapi.co/api/people and planets at https://swapi.co/api/planets
Invoke-Restmethod
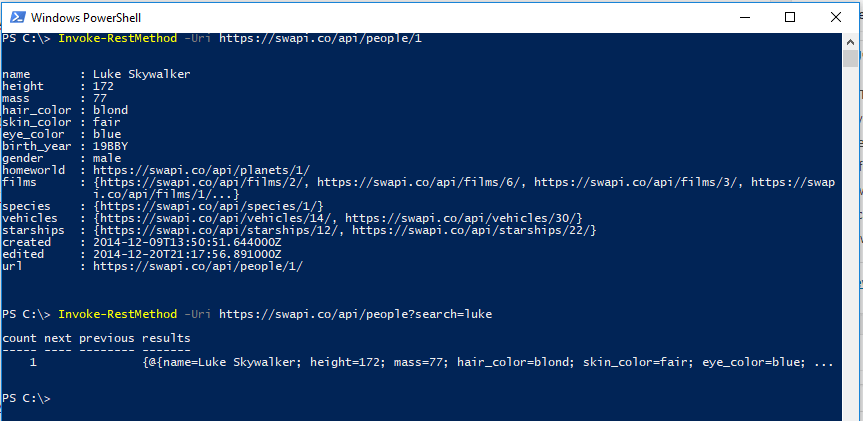
To use this with Powershell and Invoke-RestMethod you'll just pass that URL

Next let's look at how we query specific objects.
SWAPI let's you do that either with specifying the object id directly, https://swapi.co/api/people/1, or through a query parameter, https://swapi.co/api/people?search=luke.
\
\
Powershell module
While this API might not be the best one for showing the benefits of building a module considering it doesn't do any Authentication, requires no headers etc. it's easy to work with and many people knows about the Star Wars universe making it easier to think of ways to be creative with the different resources.
So, how do we build a module around a Rest API?
First of it's important that you get to know the API and its structure as we did in the examples above. Then I'd recommend you try to create a function for getting the objects for one of the resources, both all of those objects, but also by searching/specifying. This function will probably include the required techniques for working with the different components of the API, building a header, authentication, query parameters etc. It would need input parameters for the terms or Id's to search for.
In the SWAPI example it would look something like the following:
 1function Get-SWAPIObjects {
 2    param(
 3        $Id,
 4        $Query
 5    )
 6
 7    $baseUrl = "https://swapi.co/api/"
 8    $Resource = "people"
 9
10    $Uri = $baseUrl + $Resource
11
12    if($Id){
13        $Uri += "/$Id"
14    }
15    elseif($Query){
16        $Uri += "?search=$Query"
17    }
18
19    $response = Invoke-RestMethod -Method GET -Uri $Uri
20    $response
21}
\
\
If you're happy with the output (concentrate first on getting the correct results and not how the actual results are outputted at this point), try to use a different resource and see if you get the expected output with the same function.
 1function Get-SWAPIObjects {
 2    param(
 3        $Id,
 4        $Query
 5    )
 6
 7    $baseUrl = "https://swapi.co/api/"
 8    $Resource = "films"
 9
10    $Uri = $baseUrl + $Resource
11
12    if($Id){
13        $Uri += "/$Id"
14    }
15    elseif($Query){
16        $Uri += "?search=$Query"
17    }
18
19    $response = Invoke-RestMethod -Method GET -Uri $Uri
20    $response
21}
\

\
Notice that the only thing changed in the function is the $Resource variable
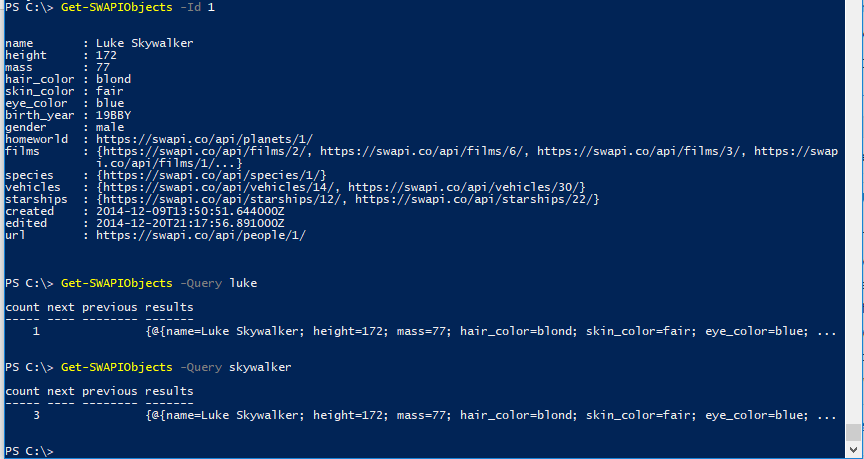
So, we can see that we easily can reuse the same code and structure for multiple resources in this API. Now let's take a look at the actual output.
We saw that if the call was made with specifying the ID of the object we got that object directly. In the other calls we got a different output which had the actual objects inside the "results" property.
Let's try to change our function slightly so that we can output the objects directly each time
 1function Get-SWAPIObjects {
 2    param(
 3        $Id,
 4        $Query
 5    )
 6
 7    $baseUrl = "https://swapi.co/api/"
 8    $Resource = "people"
 9
10    $Uri = $baseUrl + $Resource
11
12    if($Id){
13        $Uri += "/$Id"
14    }
15    elseif($Query){
16        $Uri += "?search=$Query"
17    }
18
19    $response = Invoke-RestMethod -Method GET -Uri $Uri
20    if($response.results){
21        $response.results
22    }
23    else{
24        $response
25    }
26}
\
\
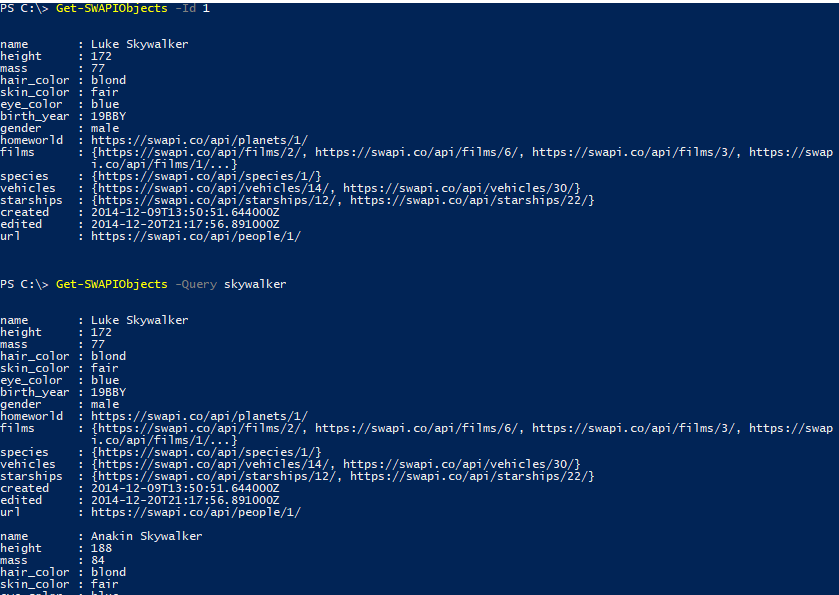
Now we get the actual objects outputted in both scenarios.
Note that this might differ from other APIs which is why you need to get to know the API by exploring it when you build your module.
After confirming that the same function works for our other resources it's time to finish our SWAPI module.
The special Invoke function
The key to this module will be the Invoke-SWAPIRequest function which is actually the function we've seen already. We'll rename the Get-SWAPIObjects to Invoke-SWAPIRequest. Then we'll create one Get-SWAPI_Resource_ function for each of the available resource endpoints in the API.
We will also do a couple of other changes to accomodate a few other things.
The objects will have some properties containing a full URI to a different object. For this we will add an URI parameter to the Invoke function so that we can call that directly. I've also added this to it's own Parameterset while Resource and Query is in a different one so that the enduser only should be able to use either URI or Resource/query. Furthermore the API returns paged results. While you might want this, I will page over all results to be able to output all results for a resource if no query or ID parameter is given.
The full Invoke-SWAPIRequest will also include a synopsis, but I've removed this for brevity.
 1function Invoke-SWApiRequest {
 2    [CmdletBinding()]
 3    param(
 4        [parameter(ParameterSetName="Res")]
 5        $Resource,
 6        [parameter(ParameterSetName="Res")]
 7        $Query,
 8        [parameter(ParameterSetName="Uri")]
 9        $Uri,
10        $Method = "GET"
11    )
12    $baseUrl = "https://swapi.co/api/"
13    $output = @()
14
15    if($Uri){
16        Write-Verbose $uri
17        $output = Invoke-RestMethod -Method $Method -Uri $uri
18    }
19    else{
20        if($Query){
21            $query = "?search=" + $query
22        }
23        $uri = $baseUrl + $Resource + "/" + $Query
24
25        $response = Invoke-RestMethod -Method $Method -Uri $Uri
26        if($response.next){
27            while($response.next){
28                Write-Verbose $response.results.count
29                $output += $response.results
30                $response = Invoke-RestMethod -Method $Method -Uri $response.next
31                if(!$response.next){
32                    $output += $response.results
33                }
34            }
35        }
36        else{
37            $output = $response
38        }
39    }
40
41    if($output.results -and $output -is [pscustomobject]){
42        $output.results
43    }
44    else{
45        $output
46    }
47
48}
The resource functions will all look like this with the only difference in the $resource variable
 1function Get-SWAPIPeople {
 2    [CmdletBinding()]
 3    param(
 4        [int]
 5        $Id,
 6        [string]
 7        $Query
 8    )
 9
10    $resource = "people"
11
12    if($Id){
13        $resource += "/" + $Id
14    }
15
16
17    $method = "GET"
18
19    $response = Invoke-SWApiRequest -Method $method -Resource $resource -Query $Query
20    $response
21
22}
All functions will be put in the same PSM1 file and to finish of the module you'll create a module manifest (PSD1 file). This is the descriptor file for the module containing stuff like information about the Author, other required modules, license etc. You could create this from scratch, but there is a nice New-Modulemanifest cmdlet which can do it for you based on the input parameters you give it.
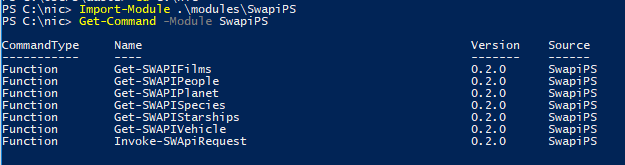
Both the PSM1 and PSD1 file should be put in the same folder and the folder name should match the name of the module. Then you can use the Import-Module cmdlet and point it to the path of the folder and you'll have the cmdlets available.
\
\
The full SwapiPS module can be found at GitHub
Dealing with Authentication, Headers etc
As fun as it is playing around with the Star Wars API there isn't much happening in terms of what you'll need to do to get the API calls to work. That's why we searched for an API that needed authentication and who also could be mapped to a common workflow, namely creating support tickets. We found the online ticketing system, SupportBee.
The SupportBee API has a similar structure as SWAPI. And after exploring it like we did with the SWAPI we'll continue with our special support function and we're naming it Invoke-SBAPIRequest.
We can see from the documentation that all API request needs to include a Header with the Content-Type and the Accept options set. In addition all request besides the Create ticket request requires Authentication. This API uses Token Authentication and the token should be sent with the HTTP request in the auth_token parameter.
All of this goes in to the Invoke function so that we'll only need to write that code once and all the other functions of the module will use that Invoke function to do the actual API calls.
 1function Invoke-SBApiRequest {
 2    [cmdletbinding()]
 3    param(
 4        [parameter(Mandatory=$true)]
 5        $SBCompany,
 6        [parameter(Mandatory=$true)]
 7        $Resource,
 8        $Query,
 9        $Content,
10        $Method = "GET",
11        $AuthToken
12    )
13        $baseUrl = "https://$SBCompany.supportbee.com/"
14
15        if(!$AuthToken -and $Resource -ne "tickets" -and $Method -ne "POST"){
16            Write-Error "Authentication token is mandatory for this request!"
17        }
18
19        $headers = @{
20            "Content-Type" = 'application/json';
21            "Accept" = 'application/json';
22        }
23
24        if($AuthToken){
25            if($query){
26                $Q = "&" + $Query
27            }
28            $uri = $baseUrl + $Resource + "?auth_token=$AuthToken" + $Q
29        }
30        else{
31            $uri = $baseUrl + $Resource
32        }
33
34        if($Method -eq "POST"){
35            $body = $Content
36        }
37
38        Invoke-RestMethod -Method $Method -Uri $uri -Headers $headers -Body $body
39
40}
In this Invoke function we'll just return the result of the API call directly since the output object differs in what the "result" property will be named. Therefore we'll specify the output further in each of the functions.
What we'll see is that the company name and the auth token needs to be passed to the Invoke function every time. This is because we need to include the company name in the URI and because the token needs to be passed in the URI each time. This follows the REST principles as they state that a RESTFUL API should be stateless, at least from the server's perspective.
You could use a couple of techniques to skip passing this every time. The company name could easily be hard coded if you only have one company to work with. The token is created by a specific user and could differ in your scenario. Sadly there is no API endpoint for retrieving the token, but you could store it as a global Powershell variable for the user, or you could add it as an environmental variable. For our purposes we'll add it to each function call.
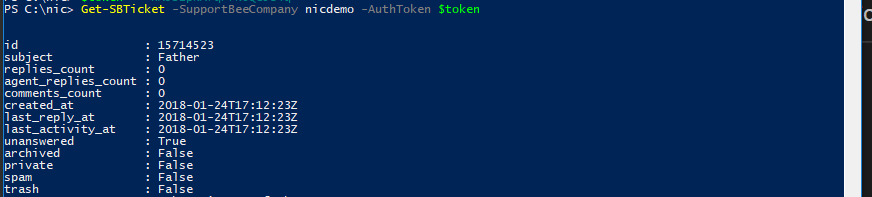
The Get-SBTickets looks like this
 1function Get-SBTicket {
 2    [cmdletbinding(DefaultParameterSetName="default")]
 3    param(
 4        $SupportBeeCompany = "nicdemo",
 5        [parameter(parametersetname="id")]
 6        [int]
 7        $TicketId,
 8        [parameter(parametersetname="qry")]
 9        [switch]
10        $UnansweredOnly = $false,
11        [parameter(Mandatory=$true)]
12        $AuthToken
13    )
14    if ($UnansweredOnly) {
15        $qry = "label=unanswered"
16    }
17    $resource = "tickets"
18    if($ticketid){
19        $resource += "/$ticketid"
20    }
21    $response = Invoke-SBApiRequest -Method GET -SBCompany $SupportBeeCompany -Resource $resource -AuthToken $AuthToken -Query $qry
22
23    if($response.tickets){
24        return $response.tickets
25    }
26    if($response.ticket){
27        return $response.ticket
28    }
29}
And the function is used like this:
\
\
Being that this module is used with a ticketing system we obviously need to be able to create tickets.
Here we'll see another reason for building modules. Namely ensuring a correct body syntax.
 1function New-SBTicket {
 2    [cmdletbinding()]
 3    param(
 4        $SupportBeeCompany = "nicdemo",
 5        [parameter(Mandatory=$true)]
 6        $Requester,
 7        [parameter(Mandatory=$true)]
 8        $RequesterEmail,
 9        [parameter(Mandatory=$true)]
10        $Subject,
11        [parameter(Mandatory=$true)]
12        $Message,
13        $AuthToken
14    )
15
16    $Content = @{
17        ticket = @{
18            subject = "$Subject"
19            requester_name = "$Requester"
20            requester_email = "$RequesterEmail"
21            content = @{
22                text = "$Message"
23            }
24        }
25    } | ConvertTo-Json -Depth 3
26
27    Invoke-SBApiRequest -Method "POST" -SBCompany $SupportBeeCompany -Resource "tickets" -Content $Content -AuthToken $AuthToken
28}
By using this function your users would be able to create tickets by using normal Powershell input parameters instead of struggle with creating a JSON payload and knowing what the syntax should be like, and which parameter names they have to use.
\

\
In this module we've chosen to mask the Invoke function as it doesn't have much use for an end user
\
\
This could be done in the PSM1 file, but you could also do it in the definition file by specifying which functions to export
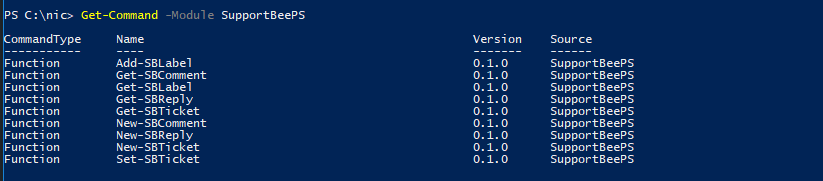
 1# Functions to export from this module, for best performance, do not use wildcards and do not delete the entry, use an empty array if there are no functions to export.
 2FunctionsToExport = @(
 3    'Get-SBTicket',
 4    'New-SBTicket',
 5    'Set-SBTicket',
 6    'Get-SBComment',
 7    'New-SBComment',
 8    'Get-SBReply',
 9    'New-SBReply',
10    'Get-SBLabel',
11    'Add-SBLabel'
12)
As this module was created with the focus of demoing how and why you should create a module as an API wrapper it doesn't do much of error handling so if you are considering using it for a production purpose be sure to add that to your code.
The full SupportBeePS module is available at GitHub
Summary
As you might know or have understood already, many Powershell modules are "just" wrappers for a web API.
Hopefully this post has shown how you can use Powershell modules as a wrapper for an API so that you could make it easier to consume it, both for yourself and also for your end users who might not know how to deal with Authentication, Headers and ensuring the correct Body syntax.